Understand the Importance of Lighting
Why proper lighting matters before uploading photos GIMP
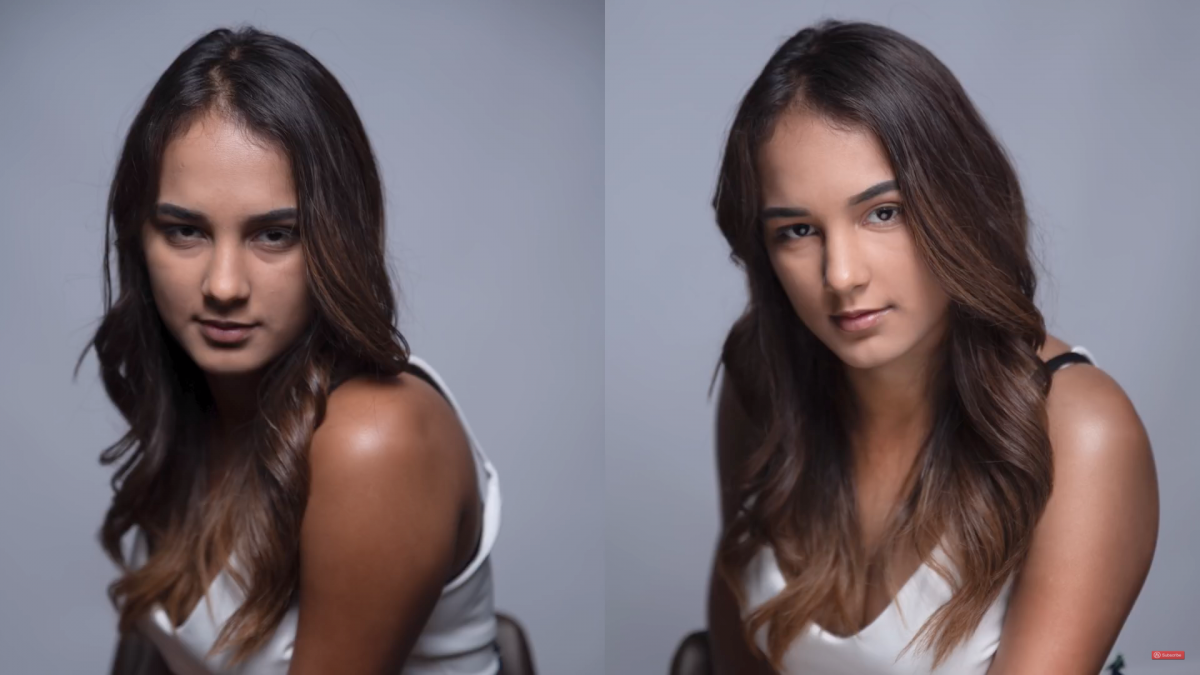
Lighting can dramatically change the feel and quality of any photo. Whether you're sharing a portrait, landscape, or everyday moment, understanding how light works is key to making your pictures more engaging. Proper lighting ensures your subject is visible, colors appear vibrant, and shadows support rather than overwhelm the composition. Harsh lighting or poor exposure often results in dull, lifeless images. With attention to brightness and shadows, and a few editing refinements, even simple photos can stand out naturally.
Use Natural Light to Your Advantage
Plan your shots based on time and conditions
Natural light is one of the easiest ways to enhance your photos. Taking pictures during golden hour—the hour after sunrise or before sunset—can add warmth and softness that artificial lighting struggles to replicate. Overcast days offer even light distribution, perfect for portraits. Avoid midday when sunlight is harsh and shadows fall sharply. Positioning your subject near a window or open door can also bring in a gentle fill light, giving the photo more dimension without needing extra tools.
Brightness Adjustment Essentials
Control overall light levels without losing detail
Brightness plays a foundational role in how a photo feels. Too much brightness can wash out important features, while too little may hide key elements. Start by slightly increasing brightness only when shadows dominate the image. This helps lift the overall mood without flattening details. Conversely, reducing brightness can give an image a more moody or dramatic appearance, particularly in evening shots. Aim for a balanced result that reflects the real moment but with a cleaner, polished look.
Mastering Contrast for Vivid Results
Increase visual impact with subtle contrast adjustments
Contrast adjustment deepens the difference between the darkest and lightest areas, adding visual sharpness. However, overdoing it can introduce noise and unnatural tones. Raise contrast gradually until your subject gains clarity and edges feel crisp. Low-contrast photos often look faded or blurry, but too much can strip the image of nuance. The goal is to enhance visual distinction without making the photo look artificial. Tools like GIMP allow for precise adjustments that maintain a natural effect.
Shadows and Highlights Control
Balance depth and brightness without over-editing
Shadows bring depth, while highlights emphasize brightness. Balancing the two helps retain both texture and clarity. Lowering highlights can recover lost detail in bright areas, such as clouds or reflective surfaces. Lightening shadows can uncover hidden features without affecting the rest of the photo. This fine-tuning brings out depth and makes images appear more lifelike. It’s often Important! to treat shadows with care, especially in outdoor scenes, to avoid overly flat results.
Understanding Exposure Settings
Correct exposure creates a solid foundation for edits
Exposure affects every visual element of your photo. Underexposed images appear too dark, while overexposed shots lose clarity in light areas. Before editing, assess whether the original shot is correctly exposed. Minor adjustments can fix dim corners or overly bright skies. If you're capturing photos manually, adjust shutter speed or aperture to balance light. In editing tools such as GIMP , look for exposure sliders that let you refine brightness globally before focusing on specific regions.
Avoiding Over-Editing Pitfalls
Keep your photos realistic and natural-looking
It's easy to go overboard when enhancing brightness, contrast, or shadows. Over-editing results in exaggerated colors, halos, or awkward transitions that distract viewers. Always zoom in and out to assess changes across the whole image. Use gentle, incremental changes instead of extreme values. If your goal is to enhance rather than transform, less is more. The best edits are often subtle, enhancing mood while retaining authenticity. (Important!) Always compare with the original to stay on track.
Why Color Balance Supports Lighting
Subtle adjustments to tone enhance lighting improvements
Even though this article focuses on lighting, color tone plays a complementary role. If a photo feels too cold or warm, slight temperature adjustments can support your lighting improvements. For example, warm tones can accentuate golden hour effects, while cool tones enhance shadows during blue hour. Tools like GIMP offer white balance and temperature sliders to help align color with light. This ensures that your lighting edits don’t clash with the emotional tone of the image.
Final Thoughts on Lighting Edits
Make thoughtful adjustments and elevate your uploads
Lighting adjustments can lift ordinary photos into striking visuals when applied with care. By understanding natural light, fine-tuning brightness and contrast, and balancing shadows and highlights, you can prepare your photos confidently for social sharing. Whether you're editing with built-in tools or free resources like GIMP, remember that each adjustment should serve the photo’s mood and message. Consistency, subtlety, and awareness of light will help you create visual content that truly connects with others.