Why Sharpness Matters in Photos
Enhance clarity without compromising natural beauty GIMP
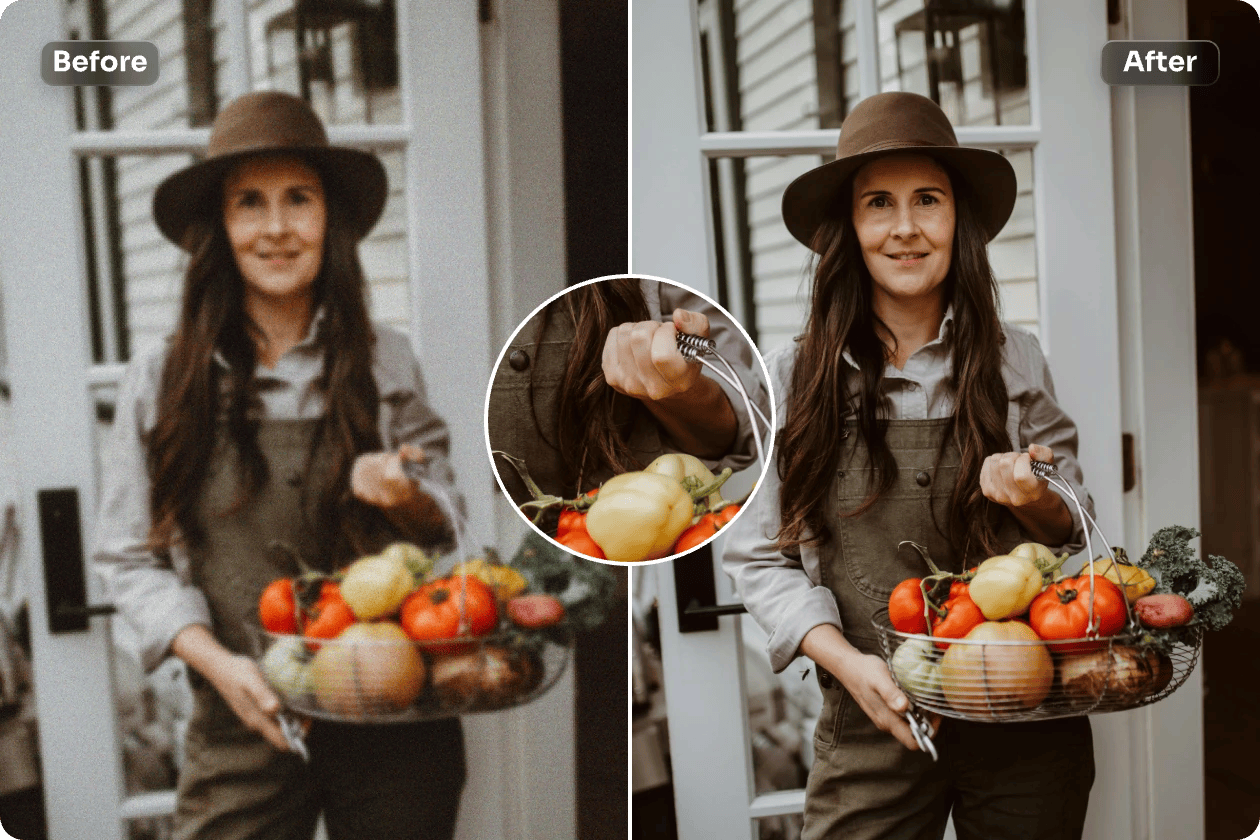
A photo with sharp detail immediately captures attention. Whether it’s a landscape, a portrait, or a close-up, clarity adds impact and structure. Sharpening is the technique used to enhance the fine details and textures within an image, making edges more defined and visual elements more distinct. But like many editing steps, sharpening must be done with care. Too much of it, and the image can appear artificial, noisy, or harsh. With proper control, sharpening improves visual strength while preserving realism.
Understanding the Sharpening Process
How sharpening refines the visual structure
Sharpening works by increasing contrast at the edges where different tones meet. This makes transitions between colors or textures more pronounced, creating the illusion of greater detail. It’s not about creating new information in the photo, but enhancing what’s already there. This is why sharpening should be applied toward the end of your editing process—once exposure, contrast, and color are set. A gentle touch brings clarity to hair, textures, or architecture, and keeps the photo feeling natural and focused.
Use GIMP for Precision Sharpening
Access tools that allow for detailed adjustment
One of the most effective ways to sharpen your images with control is by using GIMP , which provides different methods such as unsharp masking and high-pass filters. These tools allow you to target specific areas or edges without affecting the entire image uniformly. (Important!) Global sharpening might boost unwanted elements like noise or grain, while selective sharpening allows for refinement in key zones only. With masks and layers, you can limit sharpening to faces, eyes, or architectural lines while keeping backgrounds soft and untouched.
Avoiding the Over-Sharpening Trap
Know the limits to maintain image integrity
A common mistake in editing is sharpening an image to the point where it loses realism. When pushed too far, sharpening creates halos—light or dark outlines around edges that weren’t present in the original photo. It can also exaggerate noise, especially in shadow areas, and cause skin textures to look unnatural. To prevent this, always zoom in and out while editing and keep adjustments minimal. If you start noticing distortion or glowing lines, you’ve likely gone too far.
Selective Sharpening for Best Results
Focus enhancement where it matters most
Not every part of an image needs to be sharp. Selective sharpening is a targeted technique that brings focus to the key subject while leaving the rest smooth. In portraits, this means sharpening the eyes, lashes, and hair strands while softening the skin. In landscapes, sharpen structures, trees, and edges while keeping skies and clouds soft. With tools like GIMP , you can create masks to isolate areas, allowing for tailored sharpening that respects the original balance of the image.
Crisp Lines Define Strong Composition
Bring structure and stability to visual storytelling
Clean, well-defined lines give structure to any photo. Sharpening helps bring out these lines, reinforcing the composition and drawing the eye naturally across the image. In architecture photography, it can highlight building edges and intricate design. In nature shots, it enhances leaves, rocks, and textures. When used with restraint, sharpening reinforces the photographer’s intended lines and shapes, ensuring viewers see the image as it was envisioned. These subtle adjustments turn a good composition into a visually strong one.
Pair Sharpening with Noise Reduction
Balance clarity with smoothness in low-light shots
Low-light images or photos taken at high sensitivity levels often contain noise—random pixel variation that softens the image. Before sharpening such images, apply noise reduction to smooth out the grain. Sharpening without this step will enhance the noise, making the photo appear rough and unrefined. The challenge is to find a balance: reduce noise without erasing detail, then sharpen enough to define edges again. This combination results in a cleaner, sharper, and more polished look.
Portrait Sharpening Done Right
Retain softness while defining key facial features
When editing portraits, sharpening should highlight rather than harden. Focus on small, high-detail areas like pupils, eyebrows, and hair. Leave the skin relatively untouched to preserve a smooth, flattering appearance. Over-sharpened skin can appear textured and unrealistic, taking away from the subject’s natural charm. (Important!) Sharpening for portraits is about guiding the viewer’s eye, not emphasizing every pore. A delicate touch, using feathered masks in GIMP , helps strike this important balance.
Final Review and Export Considerations
Check details at multiple sizes before publishing
Before finalizing your edit, always view the image at different magnifications. What looks sharp up close may appear overly harsh when scaled down for social sharing. Make use of comparison previews and consider how the sharpened image will appear on different screens. Export at the right resolution and compression level to preserve the refined edges. Thoughtful sharpening makes the difference between an average photo and one that stands out with clarity, purpose, and visual strength.